A Guide to Studio Photography Lighting Setup
- contact733797
- Aug 8, 2025
- 17 min read
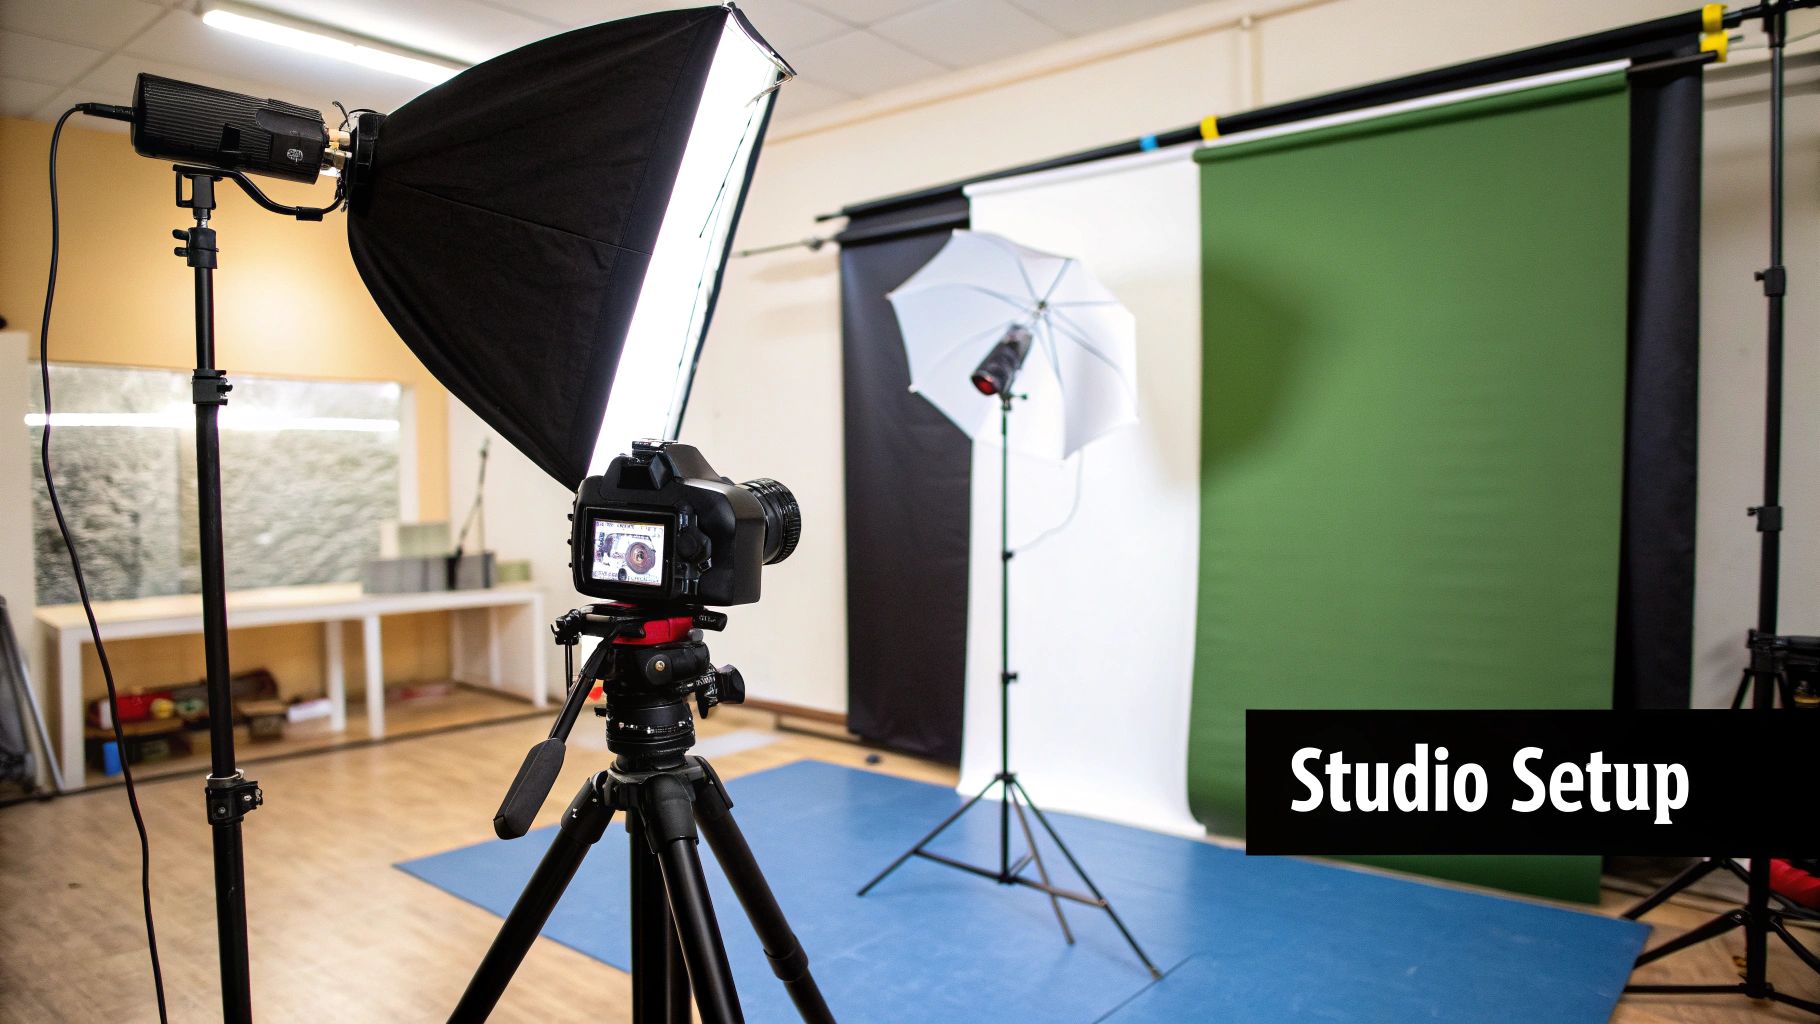
When you're building a studio photography lighting setup, your first big decision boils down to one thing: are you using lights that stay on, or ones that flash?
Continuous lights are brilliant for anyone starting out, and they're essential if you're shooting video. You can see exactly how the light falls on your subject in real-time. For sheer power and that ultra-crisp image quality, though, strobes are the professional standard.
Choosing Your Foundation: The Right Studio Lights
Every great creative project starts with a solid foundation, and it’s no different in studio photography. Honestly, your lights are the most critical gear you'll invest in. They'll influence the mood and quality of your images far more than the camera body itself.
So, let's break down what you actually need to start creating professional-level images, whether you’re in a DIY home setup or a fully kitted-out space.
The first choice you’ll have to make is between continuous lighting and strobes. Continuous lights, which are usually LEDs these days, are just what they sound like—they stay on. This "what you see is what you get" approach is fantastic for anyone still learning how light and shadow play together. Plus, it's a must-have if you plan on shooting any video content alongside your photos.
Strobes (or flashes) are a different beast. They fire a very brief, incredibly powerful burst of light that can completely overpower any other light in the room. This gives you total control, letting you shoot at a low ISO for clean, noise-free images and a smaller aperture (like f/8 or f/11) for incredible sharpness from front to back. If you need to freeze motion or get that polished, commercial look, strobes are what most pro photographers rely on.
Understanding Light Sources and Colour Temperature
After you’ve picked between continuous and strobe, the actual bulb inside the light makes a difference, too. In Australian studio photography, artificial lighting is your best friend for getting consistent, controllable results, especially when the weather is unpredictable.
Different bulbs create different effects, both in colour and heat.
Tungsten: These cast a lovely warm, inviting glow, but they get incredibly hot during a long shoot and aren't very efficient.
Fluorescent: A more energy-efficient option, but some cheaper models can have a subtle flicker, which can mess with your exposure consistency from shot to shot.
LED: This is why LEDs have become the go-to in studios across Australia. They run cool, last for ages, and many models let you adjust the colour temperature on the fly—perfect for matching anything from warm indoor light to crisp, clean daylight.
This adaptability makes LEDs a versatile foundation for any studio photography lighting setup.
To help you decide, here’s a quick comparison of the most common artificial light sources you'll encounter.
Studio Light Source Comparison
Light Type | Key Characteristics | Best For | Considerations |
|---|---|---|---|
LED (Continuous) | Cool-running, energy-efficient, adjustable colour temperature. "What you see is what you get." | Beginners, videography, hybrid photo/video shoots, product photography. | Can be less powerful than strobes for overpowering bright ambient light. |
Strobe/Flash | Delivers a high-power burst of light. Excellent for freezing motion and creating sharp images. | Portraits, fashion, commercial work, action shots. | Has a learning curve. Not suitable for video. Requires a trigger system. |
Fluorescent (Continuous) | Softer, diffused light output. More efficient and cooler than tungsten. | Budget-conscious setups, video interviews where soft light is needed. | Can have colour cast issues (greenish tint). Potential for flicker. |
Tungsten (Continuous) | Warm, beautiful colour tone. Very high-quality light output. | Specialised cinematic looks, situations where a warm tone is desired. | Gets extremely hot. High power consumption. Fragile bulbs. |
Choosing the right light type sets the stage for the kind of work you can produce, so it pays to understand their strengths and weaknesses from the start.
Why Light Source Size Is So Important
Here’s a lighting principle that will instantly elevate your photos. Memorise this: the larger the light source in relation to your subject, the softer the light.
Think about it. A small, direct light source—like a bare camera flash—creates hard, sharp-edged shadows. But a large light source, like a big window on an overcast day, wraps light around your subject, softening those shadows for a much more flattering and professional look.
So, how do you make your small studio light bigger? That’s where light modifiers come in.
A light modifier is any piece of gear you attach to your light to change its quality, size, or shape. A good modifier is often a better investment than a more powerful light.
The classic modifier everyone should have is a softbox. It's essentially a fabric box that fits over your light with a white diffusion panel on the front. This simple tool turns your small, harsh light into a large, soft one—perfect for portraits, products, and fashion. An even bigger modifier, like an octobox (an eight-sided softbox), will produce even softer light.
Knowing what gear to choose is crucial, and our comprehensive guide on photography studio hire in Melbourne can help you identify what to look for. This knowledge means you can step into any studio, including our own, and start creating with confidence.
Mastering the Powerful One-Light Setup
Don’t ever underestimate what you can do with a single light. Seriously. Some of the most iconic portraits ever shot were made with just one light source. This proves that a simple studio photography lighting setup can often be the most powerful. It's the best way to get back to basics and truly learn how to shape light.
When you're forced to work with just one light, you have no choice but to master the fundamentals. You can't just add another flash to fill in shadows or fix a mistake. Instead, you have to solve the problem by moving that one light—adjusting its height, its angle, and its quality. It’s a skill that will pay off on every single shoot you do from here on out.
For anyone just getting their feet wet, especially at a studio like That Creative Hub, starting with one light is a brilliant move. It's less to worry about, letting you focus on what really matters: connecting with your subject, not getting lost in gear.
Creating Timeless Portraits with One Light
With a single key light, you can conjure up a whole spectrum of moods. From soft and ethereal to dramatic and chiselled, it all comes down to where you put it. Two of the most timeless one-light techniques you'll see everywhere are Rembrandt and loop lighting.
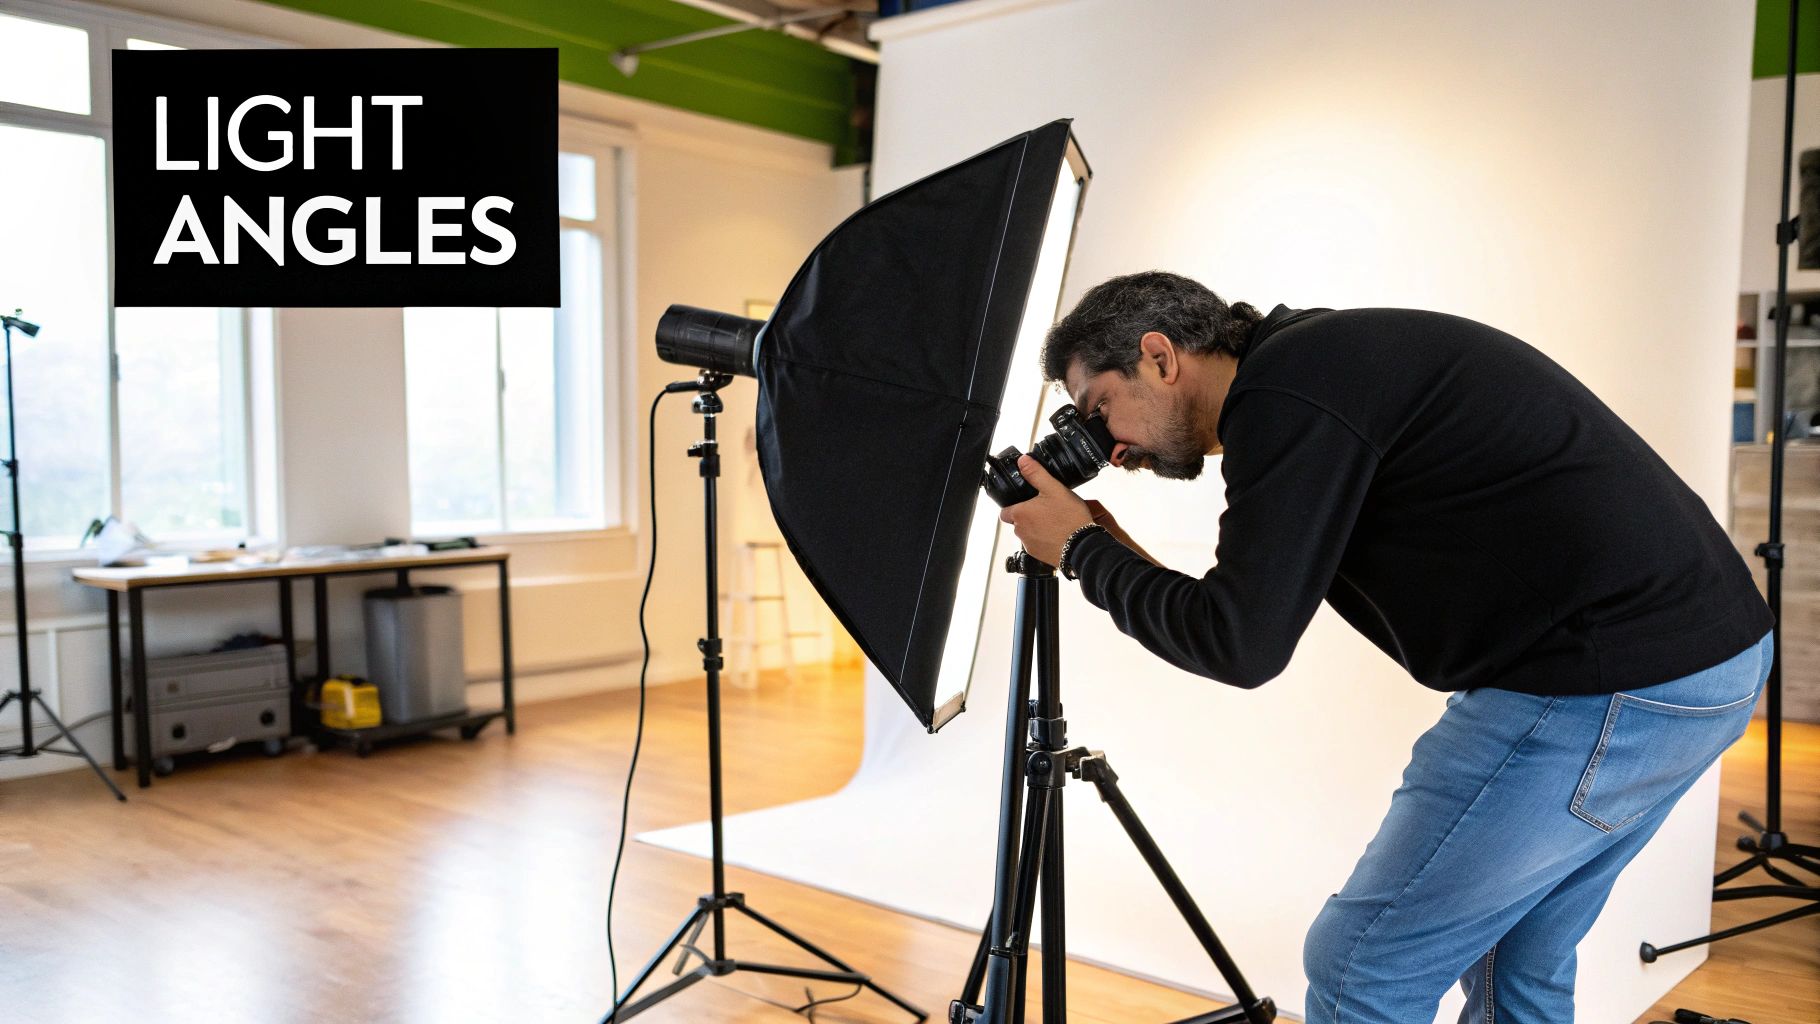
Rembrandt Lighting: This is all about creating that little inverted triangle of light on the cheek opposite your main light. To get it, you'll want to place your light at roughly a 45-degree angle to your subject and just above their eye level. It’s known for its moody, artistic vibe that really adds a sense of depth and character.
Loop Lighting: A bit less dramatic but incredibly flattering, loop lighting is a true workhorse. You achieve this by moving the light slightly more towards the front, which creates a small "loop" of shadow from the nose pointing towards the corner of the mouth. It’s a favourite for professional headshots because it defines features beautifully without being too intense.
Remember, the modifier you choose completely changes the game. A big softbox will give you that gorgeous, wrapping light, while a gridded strip box will create a much tighter, focused beam for a more high-fashion, dramatic effect.
This infographic breaks down the thinking behind a multi-point lighting setup, but you'll notice it all starts with mastering that first key light.
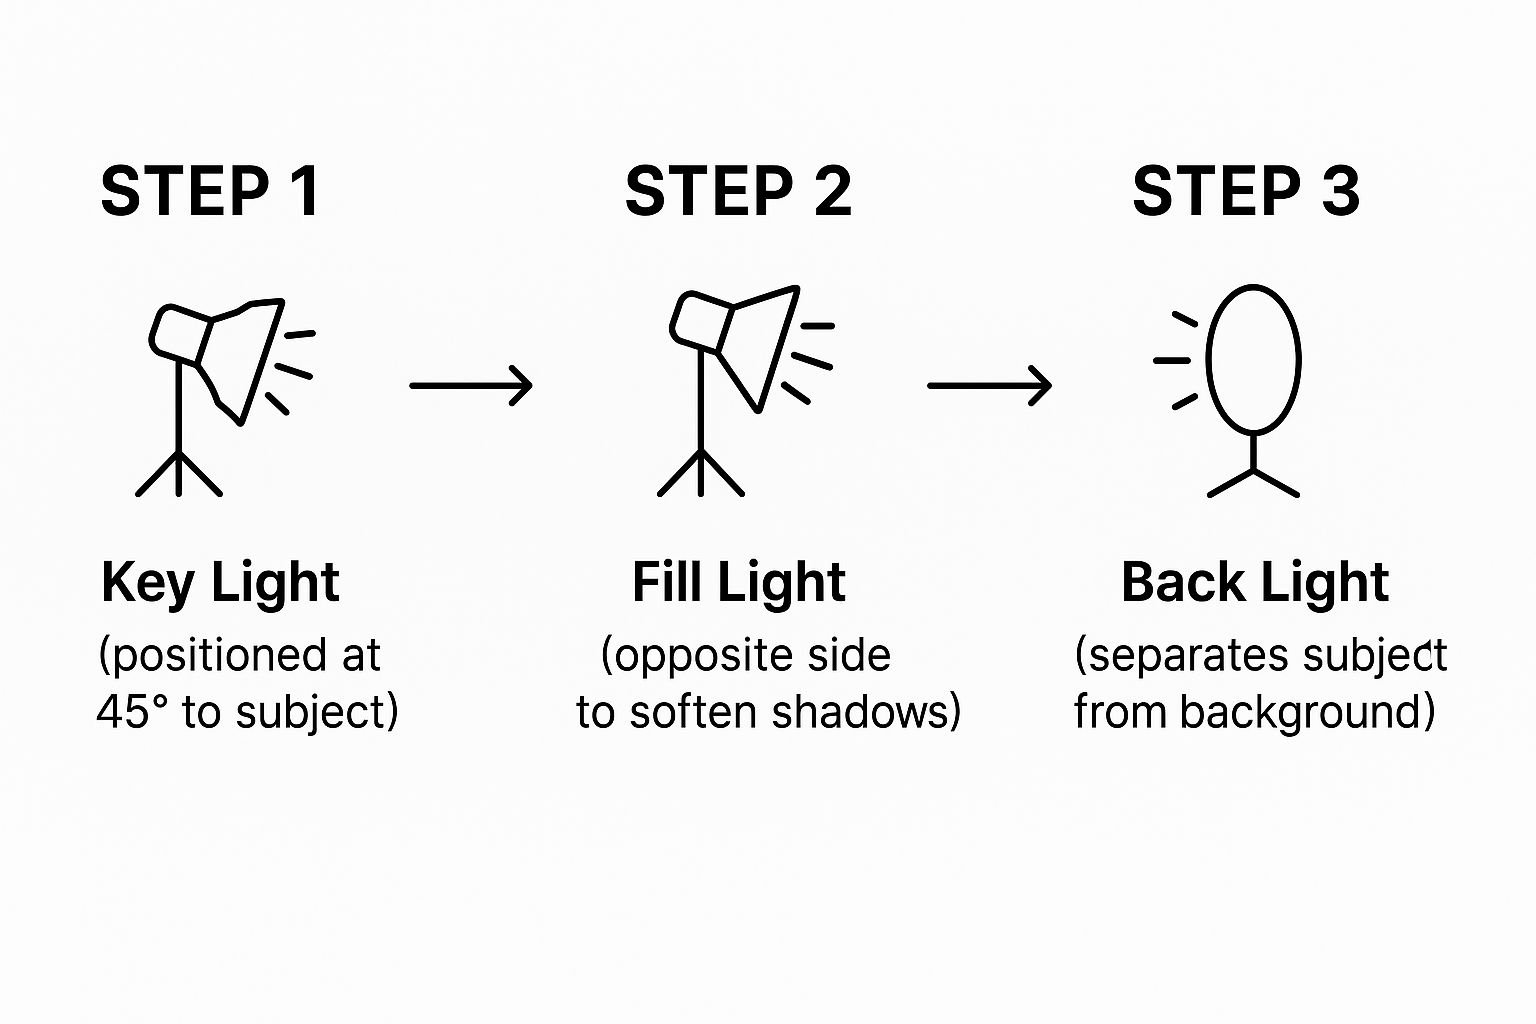
As the visual shows, every light builds on the one before it, but it's that crucial key light that sets the entire mood and exposure for the shot.
The Power of Bounced Light
Working with a single light doesn't mean you're stuck with just one source of illumination. One of my favourite tricks is to use a reflector as a second, completely free "fill light." By placing a white or silver reflector opposite your key light, you can bounce some of that light back into the shadows.
This one simple move instantly softens the contrast. It lifts the shadows just enough to bring back detail without making the image look flat. It’s an incredibly effective way to get a polished, high-end look with the most basic gear.
Don't have a pro reflector? No worries. A big piece of white foam board from an art supply store does the job perfectly. In a real pinch, just position your subject near a white wall—our Cyclorama Studio, for example, is basically a giant, built-in bounce source.
Learning this technique is invaluable. It trains your eye to see the entire environment as part of your lighting kit. You start to realise that light can be shaped by so much more than strobes; walls, floors, and even a simple piece of card become powerful tools in your hands.
Creating Depth with a Two-Light Setup
This setup hits the sweet spot between professional polish and getting things done efficiently. You can create images with genuine depth and clean separation—that commercial feel—without getting tangled up in the complexity of juggling too many lights. Honestly, for many of us, a two-light setup is the go-to we'll rely on for most of our careers.
Defining Roles: The Key and Fill Light
Your first light, the key light, is still the star of the show. It’s your main light source, the one that sets the overall exposure and carves out the primary shadows that give your subject form. Everything you learned about placing a single light for Rembrandt or loop lighting still holds true.
The second light plays a crucial supporting role as the fill light. Its job is simple but vital: to manage the shadows cast by the key light. By adding a fill, you gain incredible precision over your image's contrast. A strong fill light gives you a bright, low-contrast look, whereas a weaker one just gently lifts the shadows to bring back a touch of detail.
This core principle is fundamental to any versatile studio photography lighting setup. It's what separates a dramatic, moody portrait from a bright, welcoming corporate headshot.
Achieving Your Look with Lighting Ratios
The power relationship between your key and fill lights is measured in lighting ratios. It sounds technical, but the idea is actually quite simple. A ratio of 2:1 means your key light is twice as bright as your fill, creating soft, gentle shadows. Push that to a more dramatic 8:1 ratio, and your key light is eight times brighter, resulting in deep, defined shadows.
Here are a few common scenarios I find myself using:
Corporate Headshots: I usually aim for a 2:1 or 3:1 ratio. This gives me a clean, even lighting that feels professional and approachable. Your fill light will be set to about half the power of your key.
Fashion and Beauty: A ratio around 4:1 or 5:1 often hits the mark. It provides enough contrast to really sculpt facial features and pop the textures in clothing without looking overly harsh.
Cinematic Portraits: To get that moody, high-contrast feel, I’ll push the ratio to 8:1 or even higher. Here, the fill light is just a whisper, keeping the shadows deep and full of mystery.
Here in Australia, the two-light setup is the bread and butter for a huge number of photographers. Data shows that 70-80% of beginner to intermediate studio setups are built around a simple key and fill light configuration, which is more than enough to get professional results. This efficient approach, often just a softbox for the key and a reflector as fill, helps slash setup time by up to 40% while delivering versatile, high-quality images. You can see this popular 'signature light' in action by exploring the techniques of practitioners like Felix Kunze.
Beyond the Fill: Using Your Second Light for Separation
Your second light isn't just for filling shadows. Another powerful trick is to use it to separate your subject from the background, creating that three-dimensional pop that really screams 'professional'.
This is where rim and hair lights come into play.
Hair Light: Placed above and behind your subject (usually on a boom arm), this light is aimed down at the top of their head and shoulders. It creates a beautiful, subtle highlight that lifts them away from a dark backdrop.
Rim Light (or Kicker): Positioned behind and to the side of your subject, this light traces their outline with a crisp edge. It's fantastic for accentuating shape and form, especially in athletic or fashion photography.
When using a hair or rim light, your key light still does the heavy lifting for the main exposure. This second light is purely about adding that final polish. You can play with its intensity, but I find a subtle glow is often far more effective than a bright, distracting flare. Whether you’re shooting in our Cyclorama Studio or a space you’ve built yourself, mastering these two-light principles will elevate your work instantly.
Nailing Commercial Product Shots with Three Lights
When you need absolute control over every single pixel in the frame, the three-light setup is the industry standard for commercial photography. This is where you graduate from simply lighting your subject to sculpting the entire scene. Adding that third light gives you the power to separate, stylise, and polish your images to a truly professional grade.
The jump from two lights to three might not sound like a huge leap, but creatively, it opens up a whole new world. This advanced studio photography lighting setup is exactly how photographers produce those crisp, clean product shots you see on major e-commerce sites or build vibrant, stylised images for ad campaigns. It all boils down to giving every element in your shot—both the subject and the background—its own dedicated light source.
The Power of the Background Light
In a three-light configuration, your key and fill lights work just as they did before, shaping and defining your subject. The magic comes from the third light, which is aimed exclusively at the background. This one addition is a complete game-changer. It lets you kill any distracting shadows cast by your subject and gives you total command over the colour and brightness of the backdrop.
This is especially important when you’re shooting in a versatile space like our Cyclorama Studio. While a white cyc wall is fantastic for creating that seamless infinity look, lighting it independently ensures it looks exactly how you want it to. You’re no longer just working with a white wall; you're creating a deliberate, controlled environment from scratch.
One of the most popular uses is for creating a high-key look. By blasting a white background with one or two lights, you can overexpose it until it becomes a pure, brilliant white. This is an essential technique for e-commerce, as it makes products pop and is often a non-negotiable requirement for platforms like Amazon. The product looks clean, professional, and is a breeze for designers to cut out later.
Creating Mood with Gels and Colour
A background light isn’t just for making things white. It's your best friend for injecting personality and brand identity into a shoot. By simply slapping a coloured gel onto your third light, you can instantly transform a plain white or grey background into any hue imaginable.
This is a go-to technique in modern product and fashion photography. Think about the possibilities:
Vibrant Product Shots: A pop of blue or pink from a gelled background light can make a neutral-coloured product leap off the page.
Brand Alignment: You can use gels to perfectly match a client’s brand colours, creating a cohesive and instantly recognisable look for their advertising.
Creating Gradients: Aiming a gelled light at the centre of the background creates a beautiful colour gradient that fades to black at the edges, adding a tonne of depth and visual interest.
When you're trying to balance a three-light setup, meter each light on its own. Turn off your key and fill, and adjust the background light until it’s perfect. Then, switch off the background light and set your key and fill to get the right exposure on your subject. When you turn all three on, you’ll have a perfectly balanced image where the subject and background are independently and precisely controlled.
Other Ways to Use a Third Light
While dedicating that third light to the background is the classic approach, it’s not the only way to use it. If your goal is less about background separation and more about highlighting texture and shape, you can repurpose it as a "kicker" or an accent light.
A kicker light is a lot like a rim light, but it’s often placed lower and more to the side of your subject. Its job is to skim across a surface, bringing out all the subtle details and textures. For instance, a well-placed kicker can make the weave of denim fabric stand out in a fashion shoot or accentuate the embossed logo on a piece of packaging.
Here at That Creative Hub, our team can walk you through these more complex scenarios. If you’re not quite sure how to get a specific look or just need a hand with the setup, we can jump in and help. Our goal is to make it easy for you to step into a professional studio and confidently create the high-end images you’ve been picturing. Mastering this setup is a massive step towards producing work that truly stands out.
Building Your Kit on a Realistic Budget
Let's clear something up right away: putting together a capable studio photography lighting setup doesn't require emptying your bank account. The old idea that you need outrageously expensive gear to get professional results is long gone. These days, the market is full of high-performing, reliable equipment that puts pro-level lighting within reach for just about everyone.
The real skill is in making smart choices, not just grabbing the cheapest thing you can find. I always tell new photographers to focus on brands that offer a fantastic balance of price, power, and reliability. This way, you’re building a kit that can actually grow with you as your skills develop. It’s the same philosophy we champion here at That Creative Hub—empowering your vision without throwing unnecessary barriers in your way.
This mindset is especially important if you're thinking about turning your passion into a profession. Knowing how to budget for your gear is one of the first and most critical steps, which is something we dive into in our guide on how to start a photography business in Australia.
The Rise of Accessible and Reliable Gear
Not too long ago, the professional lighting world was dominated by a few big-name brands with equally big price tags. That landscape has completely changed. Brands like Godox have become staples in studios everywhere because they deliver consistent, quality light without the eye-watering cost.
But this isn't just about saving a few dollars; it's about accessibility. Photographers can now afford to own a two or three-light kit that, in the past, they would have had to rent at great expense. It's opened up a world of creative possibilities, allowing so many more artists to experiment with complex lighting setups on their own time.
Since 2018, the Australian photography industry has seen a massive shift towards affordable yet dependable studio lighting. This isn't a fluke; it's a trend driven by smarter market dynamics and photographers who are more cost-conscious than ever.
Godox, in particular, has made huge inroads in Australian studios, especially in creative hubs like Melbourne and Sydney. For many of us, it has become the go-to alternative, offering impressive durability and consistent light output—two things you simply can't compromise on when colour accuracy is everything.
Smart Investments for Your First Kit
When you're just starting, the sheer number of options can feel overwhelming. My advice? Keep it simple and begin with a solid two-light kit. Honestly, that’s more than enough flexibility for most jobs, from portraits and headshots to a wide range of product photography.
Here’s a practical shopping list to get you started:
Two Strobe Heads: Look for something in the 200-400 watt-second range. That’s plenty of punch for most indoor studio work.
Two Light Stands: Please don't cheap out on these. Sturdy stands are a non-negotiable safety essential for protecting your lights, your clients, and yourself.
One or Two Modifiers: A versatile medium-sized softbox or octobox is a perfect starting point. It will become your workhorse for creating that beautiful, soft light.
A Wireless Trigger: This is the little device that lets your camera talk to your flashes. Just make sure you grab one that’s compatible with your specific camera brand.
The impact of this accessible gear in Australia has been huge. For instance, Godox's SK400 II two-light kits are top sellers because they hit that perfect sweet spot between power and price. This is especially true when you consider that studio rental costs have jumped by around 15% since 2020, making an in-house kit a very smart financial decision. This trend has helped boost the number of new photographers trying out studio work by an estimated 25% since 2019, fuelling a much more vibrant local creative scene.
The Most Versatile Modifiers for Your Money
Once you have your lights sorted, modifiers are where you can really get creative without breaking the bank. If you're on a tight budget, focus on a few key pieces that give you the most versatility.
A large octobox (around 120cm) is an incredible first investment. It creates gorgeous, soft light that’s incredibly flattering for portraits and often works perfectly as a single key light. Another fantastic tool is a smaller strip box, especially one with a grid. It's perfect for creating sharp rim lights, hair lights, or controlled highlights on products.
And don't forget the humble 5-in-1 reflector. It's a low-cost, essential tool for bouncing, shaping, and controlling light in countless ways.
Answering Your Biggest Lighting Questions
Even with the best gear in the world, you're bound to run into questions as you start dialling in your studio photography lighting setup. I've seen countless creators grapple with the same challenges, so let's break down some of the most common ones. Getting a handle on these points will help you think on your feet and truly master the final look of your images.
After all, the goal isn't just to own the right equipment; it's about understanding why you're using it and knowing how to pivot when things don't look quite right in the viewfinder.
Continuous Lights or Strobes?
This is probably the first major decision you'll face, and it really shapes how you work. Continuous lights, like the LED panels you see everywhere, stay on the whole time. This is a huge advantage for beginners because what you see is what you get—you can move the light around and watch the shadows shift in real-time. If you're shooting any video content, they're non-negotiable.
Strobes, on the other hand, deliver a very short but incredibly powerful burst of light. They are much stronger than continuous lights, which gives you the power to overpower any ambient light and completely control the scene. This raw power lets you freeze motion perfectly and shoot with ideal camera settings like a low ISO and a sharp aperture (think f/8) for maximum image quality. For pure power and that crisp, detailed look in portraits or product shots, strobes are the industry standard for a reason.
How Do I Stop Getting Such Harsh Shadows?
If your portraits have harsh, unflattering shadows, the culprit is almost always a light source that's too small and direct for your subject. The fix? You need to make your light source effectively larger and softer. This is exactly what modifiers are for.
Bring on the modifiers: Slap a big softbox or an octobox onto your light. This instantly transforms that small, hard point of light into a large, beautifully soft source.
Get in close: The closer your (now large) light source is to your subject, the softer and more wrapping the light becomes. It creates those gentle, flattering shadows everyone loves.
Add a fill: On the opposite side of your main light, place a reflector or even a big piece of white foam board. It will bounce light back into the shadows, lifting them just enough for a more balanced, professional look.
These techniques are the bedrock of good portrait lighting. Managing shadows is a critical skill, and for those looking to perfect their craft, exploring a dedicated space can make all the difference. You can find more insights in our guide to choosing the perfect Melbourne photography studio hire.
In a professional setting like our Cyclorama Studio, the entire environment can become a lighting tool. If you’re new to lighting, we can guide you through what you need or step in with setup support. The seamless white walls act as giant, built-in reflectors, making it easier to achieve soft, even lighting right from the start.
Do I Really Need an Expensive Camera for Studio Work?
Nope. Absolutely not. This is a huge misconception that holds so many aspiring photographers back. The quality of your lighting will have a far greater impact on your final image than the camera body itself.
Any basic DSLR or mirrorless camera with full manual controls is more than capable of producing incredible, professional-quality photos in a studio environment. Your money is much better invested in good-quality lighting and a few versatile modifiers first. A well-lit shot from an entry-level camera will always look better than a poorly-lit shot from a top-of-the-line camera. Our mission at That Creative Hub is to empower you, and that starts with knowing that great lighting—not a pricey camera—is your most powerful tool.
What Are the Best Camera Settings for Studio Strobes?
When you're working with strobes, you need to take the wheel and drive the camera yourself. Switch your camera straight to Manual Mode (M). This is crucial because it stops the camera from trying to "correct" for the super-bright burst of the flash.
Here’s a great starting point for your settings:
ISO: Lock it down to your camera's base, which is usually ISO 100. This gives you the cleanest, most noise-free image possible.
Shutter Speed: Set this to your camera's maximum sync speed, which is typically around 1/160s to 1/200s. Your shutter speed’s only job here is to kill any ambient light in the room.
Aperture: Start somewhere between f/8 and f/11. This range delivers fantastic sharpness across your subject. The aperture is what you'll use to control the brightness of the flash on your subject.
Once you've dialled these in, don't touch them again. To make your image brighter or darker, you adjust the power level on the lights themselves. This method is the key to perfectly consistent and professional exposure from one shot to the next.
Ready to put these lighting principles into practice? At That Creative Hub, we provide the space, the support, and the professional environment you need to bring your creative vision to life. Whether you're mastering a one-light setup in our Cyclorama Studio or filming your next series in our fully-equipped and flexible Podcast Studio, we’re here to help you succeed. Can’t get a crew together? Let us handle it. We act as a concierge service for creators, connecting you with trusted photographers, editors, and the right gear to bring your vision to life.
Book your studio time today and create with confidence. Learn more at https://www.thatcreativehub.au.