Build a Pro Recording Studio Room
- contact733797
- Sep 9, 2025
- 16 min read
A professional recording studio room is so much more than just four walls and a microphone. Think of it as a painter’s perfectly prepped canvas, but for sound. It's a space that's been meticulously engineered to be a sonic blank slate, free from the annoying smudges of echoes, rumbling traffic, or the buzz of a nearby fridge. This control is what lays the groundwork for truly professional audio.
What Makes a Professional Recording Studio Room
Having a properly designed recording studio room isn’t some optional extra; it’s genuinely the most crucial element for getting high-quality results, whether you’re tracking a band, recording a podcast, or laying down a voice-over. It’s a purpose-built environment where every single surface, angle, and material has been chosen to control how sound waves bounce around. The goal is to make sure what you record is nothing but pure, clean, and honest audio that truly captures the performance.
The demand for these kinds of spaces is definitely on the rise, especially here in Australia’s buzzing creative industry. The local music market alone, currently valued at around USD 245.5 million, is expected to more than double to a whopping USD 505.3 million by 2033. A big part of that growth comes from digital streaming, which has completely changed the game for how music is made and heard, putting more and more emphasis on the need for top-notch recording facilities.
The Two Core Components
When you break it down, a classic studio setup has two main areas, and each one has a very specific job to do. Getting your head around these two spaces is the first real step to understanding how a studio works its magic.
The Live Room: This is where the magic happens—where the sound is actually created. It's the performance space for the singer, the band, or the podcast host. The design of this room is all about capturing the sound in an acoustic environment that complements it, whether that means a lively, reverberant space or something more tight and controlled.
The Control Room: Think of this as the studio's cockpit. It's the technical heart where an audio engineer pilots the recording gear, listens back to the performance on incredibly accurate studio monitors, and makes all the critical calls on the sound. This room is treated to be as sonically neutral as possible, so the engineer hears exactly what's being recorded without the room adding its own colour.
A great recording begins with a great room. You can have the most expensive microphone in the world, but if your room sounds bad, your recording will sound bad. The room itself is the first and most important instrument in your signal chain.
Why the Room Matters More Than the Gear
It's a classic mistake to think that fancy, expensive gear is the secret sauce to pro-level sound. While good equipment certainly helps, the acoustics of the recording studio room have a much, much bigger impact on the final recording.
A room that hasn't been acoustically treated can introduce a whole catalogue of problems: flutter echoes, a boomy low end that muddies everything up, and noise bleeding in from outside. These aren't just minor annoyances; they can completely derail a recording and are often impossible to fix later on in the mix.
Starting with a sonically balanced room gives you a clean slate, letting the true character and nuance of the performance come through loud and clear. If you want to go deeper, have a look at our complete guide to setting up the perfect studio recording room.
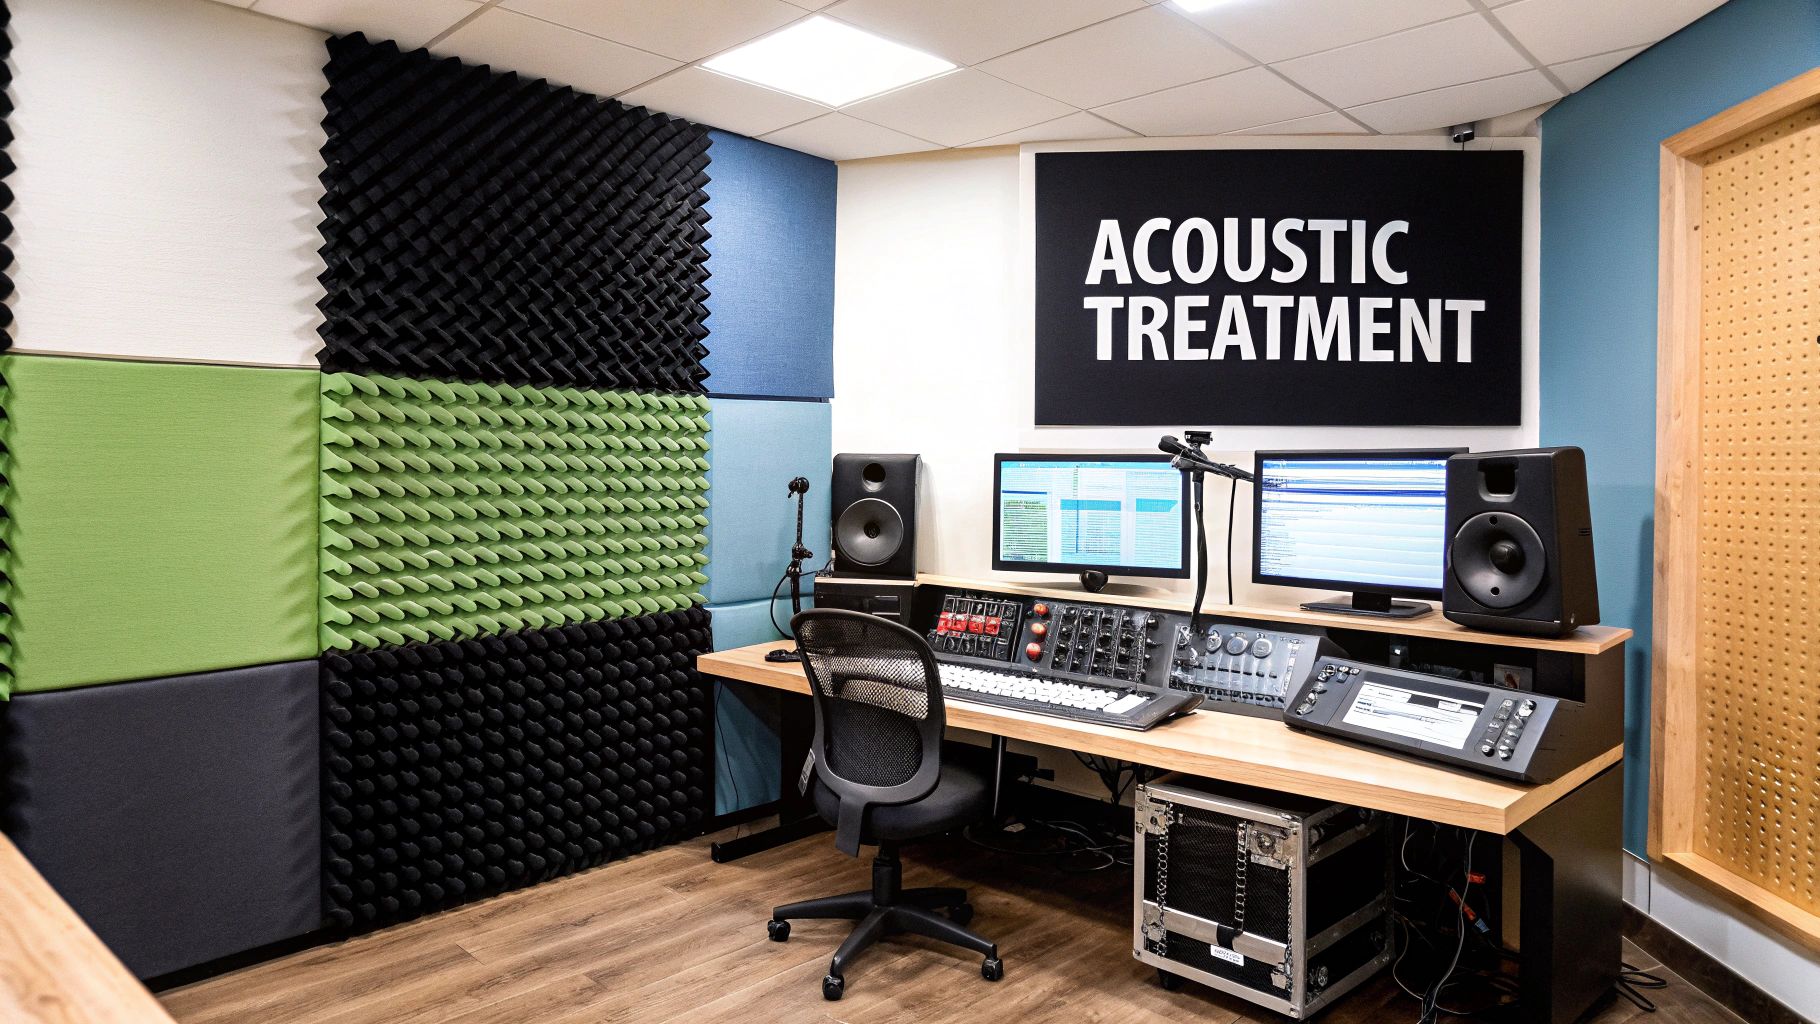
Mastering the Science of Studio Acoustics
The real secret to a professional recording studio room isn't just the flashy gear; it's the science of what you can hear. Getting control over a room's sound comes down to two key ideas that work together: soundproofing and acoustic treatment.
Let's use a simple analogy. Think of soundproofing, or isolation, as closing the door to your studio. Its job is to keep the outside world out (traffic, neighbours, the dog barking) and your creative world in (that screaming guitar amp at 2 a.m.). It gives you a quiet, sealed-off space to work in.
Acoustic treatment, on the other hand, is all about managing what happens to the sound inside that room. It ensures your recordings are crisp, clear, and free of weird sonic artifacts that can muddy the waters.
Taming the Villains of Bad Sound
An untreated room is a bit like an acoustic funhouse. Sound waves ricochet off hard, flat surfaces like a pinball, creating all sorts of chaos. These reflections build up and clash with each other, leading to some classic problems that can sabotage a brilliant take.
Standing Waves: Ever notice how some bass notes in a room sound incredibly loud and boomy, while others almost vanish? That’s the work of standing waves. They happen when sound waves bounce between parallel walls, cancelling some frequencies out and cranking others up.
Flutter Echo: You can hear this one yourself. Go into an empty room with parallel walls and clap your hands. That fast, zinging, metallic ringing sound you hear is flutter echo. It’s caused by sound bouncing back and forth so quickly that it adds a distracting, unnatural shimmer to your recordings.
Uncontrolled Reverberation: This is the lingering echo or "tail" of a sound long after it's stopped. A touch of natural reverb is nice, but too much of it makes everything sound distant, washed out, and undefined.
Your Acoustic Treatment Toolkit
Thankfully, we have tools to fix these issues. The solution is to strategically place materials that either soak up sound energy (absorption) or break it up and scatter it (diffusion). Each has a very specific job to do in shaping the sound of your recording studio room.
A room’s acoustics are like the lens on a camera. If the lens is smudged and distorted, it doesn’t matter how amazing the scene is—the final image will be flawed. Treating your room is like cleaning that lens, allowing you to capture sound with absolute clarity.
To get a clearer picture of what to use and where, it helps to see how different solutions tackle specific acoustic problems.
Acoustic Treatment Solutions Compared
This table breaks down the most common acoustic tools, showing you exactly what they do and where they work best.
Treatment Type | Primary Function | Best For Treating | Ideal Placement |
|---|---|---|---|
Bass Traps | Absorbs low-frequency energy | Standing waves and boomy bass | Room corners (floor-to-ceiling) |
Acoustic Panels | Absorbs mid to high frequencies | Flutter echo and reverberation | Side walls, front wall, back wall, and ceiling |
Diffusers | Scatters sound energy | Flutter echo and "dead" spots | Back wall behind the listening position |
As you can see, there’s a right tool for every job. You wouldn't use a diffuser to tame a boomy corner, and you wouldn't rely on thin acoustic panels to fix deep bass issues.
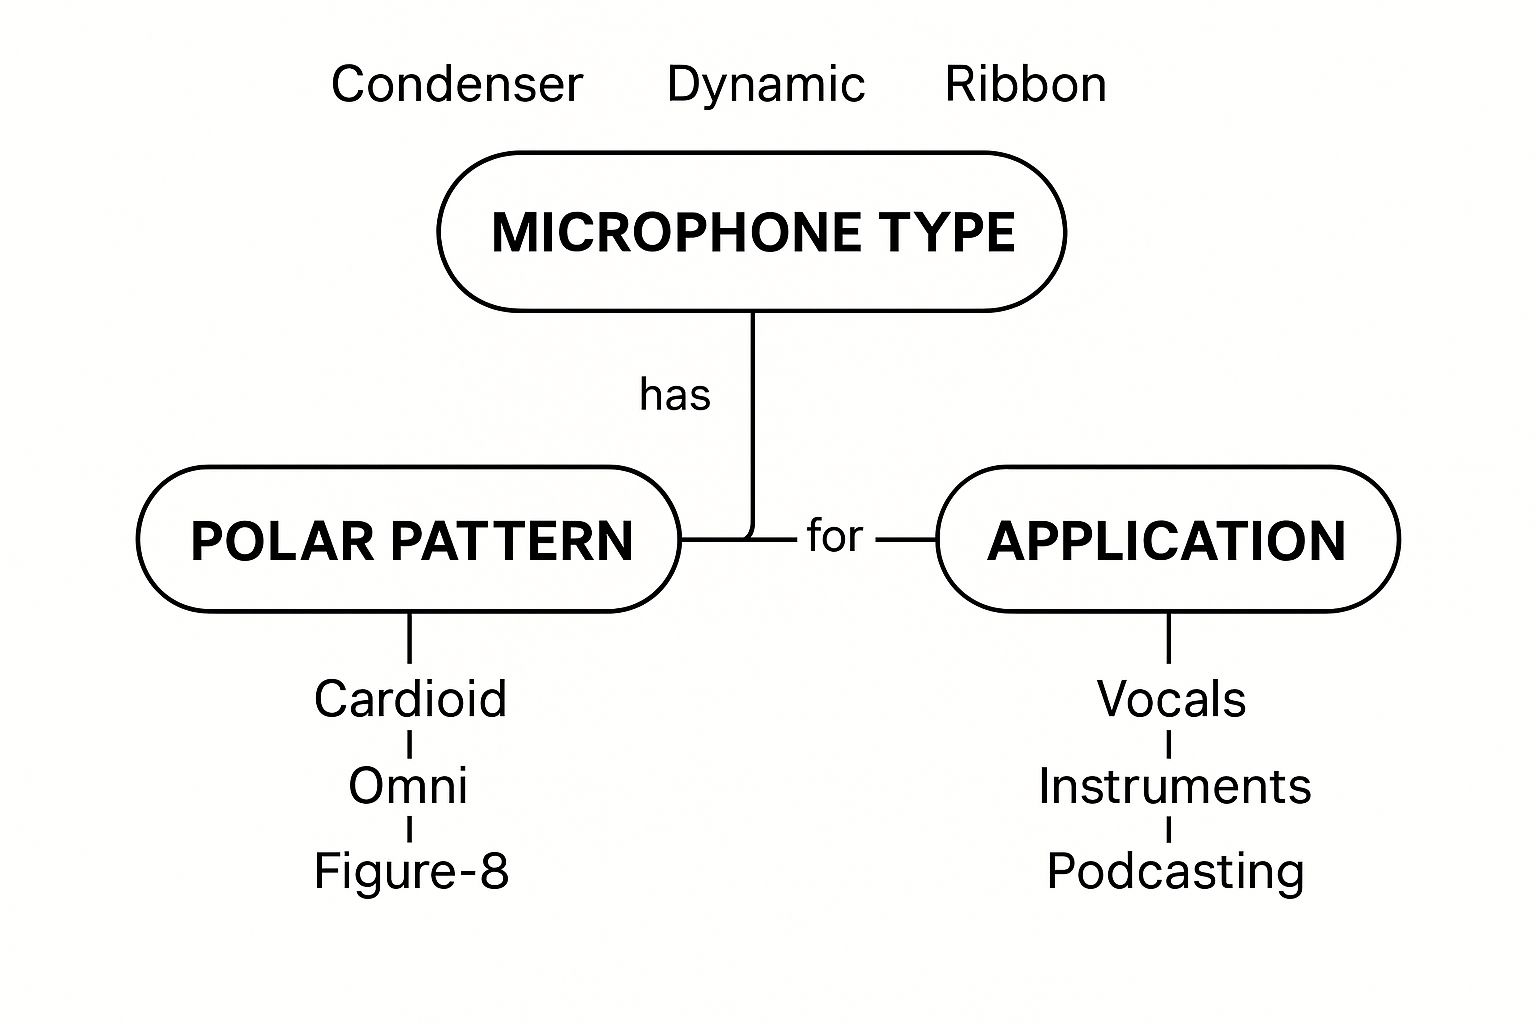
This image helps connect the dots, showing how your choice of gear, like a microphone, is directly tied to what you're trying to record. It's all about matching the right tool to the task at hand.
Where to Place Your Treatment for Maximum Impact
Just sticking panels on the wall at random isn't going to cut it. For the best results, you need to be strategic and target the "first reflection points." These are the spots on your walls, ceiling, and floor where sound from your speakers or instruments bounces once before it reaches your ears.
There’s a classic, low-tech way to find them called the "mirror trick." Sit in your main listening position (where you'll be mixing) and have a friend slide a small mirror along the side walls at your ear level. Anywhere you can see the reflection of one of your studio monitors in the mirror is a first reflection point. That’s exactly where you should place an acoustic panel.
To see how all this comes together in a real studio, take a look at our guide to music recording studio Melbourne sessions. It’s a great way to see these concepts in action and understand how to create a killer recording environment.
By applying these strategies, you can transform a chaotic space into a finely tuned instrument—one that ensures what you hear is a true, accurate picture of your music.
Choosing Your Essential Studio Gear
Okay, so you've tamed the acoustics in your room. Now for the fun part: picking your gear. This isn't just a shopping trip; it's about assembling a small, high-performance team where every piece has a crucial job. The aim is to create a seamless system that just works.
To get our heads around it, let's follow the sound on its journey—what we call the signal chain. It's a path that starts at the source and ends up on your computer. Understanding this flow is the key to making smart choices.
The Brain of the Operation: Your Digital Audio Workstation
At the very heart of any modern recording studio room is the Digital Audio Workstation, or DAW. This is the software that lets you record, edit, mix, and produce everything. It's the command centre where your creative ideas come to life.
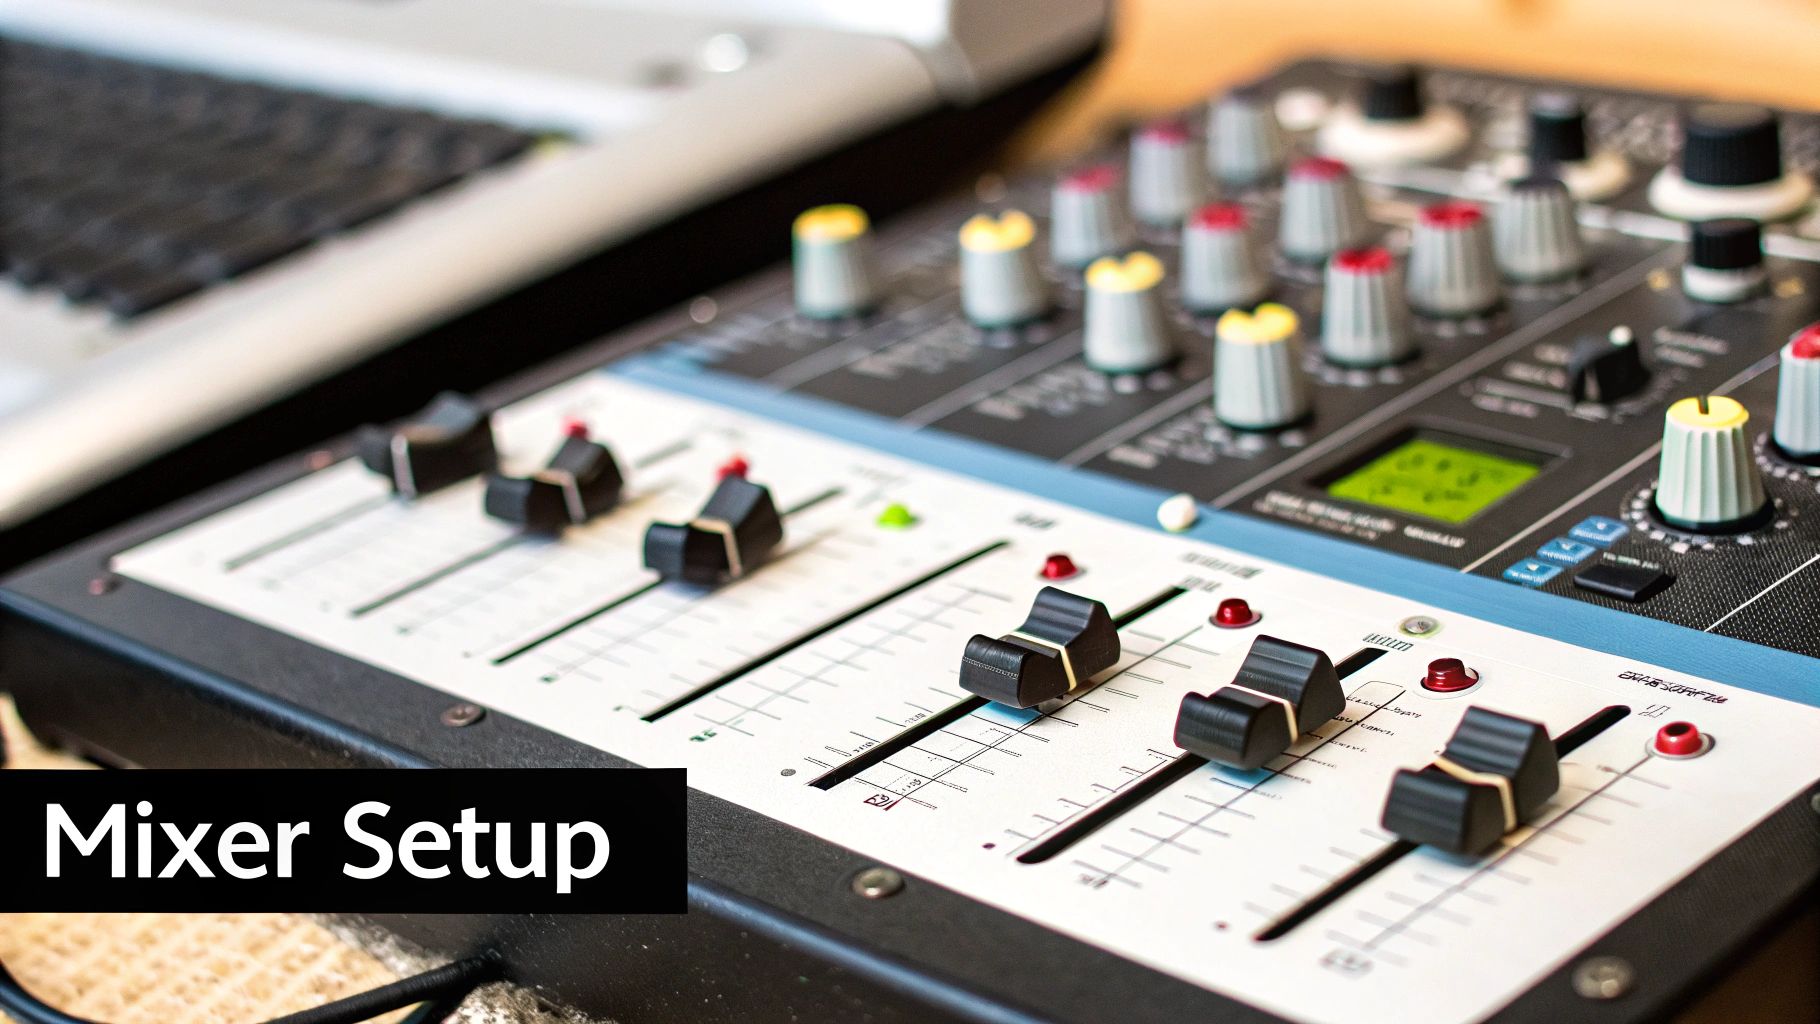
Think of a DAW as the digital equivalent of a massive, old-school mixing console, a multitrack tape machine, and a rack full of effects, all neatly tucked away inside your computer. Big names like Pro Tools, Logic Pro X (for Mac users), Ableton Live, and FL Studio all get you to the same finish line. The real difference is their workflow, so it’s worth finding one that feels natural to you.
The Translator: Your Audio Interface
Next in line is the audio interface. This bit of hardware is the vital bridge connecting the analogue world of sound (your voice, a guitar) to the digital world of your computer. It takes the electrical signals from your mic and turns them into digital data your DAW can read, then does the reverse for your speakers and headphones.
But it's more than a simple converter; it’s the central hub for all your inputs and outputs. It also houses preamplifiers (preamps), which boost the very quiet signal from a microphone up to a healthy, usable level. A quality interface with clean preamps is a cornerstone of any good setup, making sure your recordings are captured with crystal clarity and minimal noise.
The Ears of the Studio: Your Microphones
Microphones are literally the ears of your recording studio room. Their job is to capture sound waves and convert them into an electrical signal. You'll find a few different types, but two are staples in any studio:
Condenser Microphones: These are incredibly sensitive and capture a huge amount of detail. That makes them perfect for the subtle nuances of vocals, acoustic instruments, or podcasting. They need a little boost of power, called "phantom power," which your audio interface provides.
Dynamic Microphones: Much more rugged and less sensitive, dynamics are the go-to for loud sources like guitar amps, drums, or aggressive rock vocals. They're built like tanks and don't need any external power.
A great starting point is to invest in one really good, versatile condenser microphone. It’ll be a reliable workhorse that can handle a massive range of jobs while you gradually build up your collection.
Your gear choices directly shape your sound. A chain is only as strong as its weakest link. Investing in a solid interface and one great microphone will yield far better results than having a dozen mediocre components that compromise your audio quality at every step.
The Unfiltered Truth: Your Studio Monitors
Studio monitors are a completely different beast to your living room speakers. Hi-fi speakers are often designed to flatter the music—to make it sound more pleasant by tweaking the frequencies. Studio monitors are engineered to be brutally honest.
Their whole purpose is to deliver a flat frequency response. This means they reproduce the sound as accurately as possible, without adding any colour or hype. This unfiltered truth lets you hear everything, warts and all, which is absolutely essential for making precise mixing decisions that sound good everywhere else, from a car stereo to a pair of earbuds.
The Detailed Perspective: Your Headphones
Finally, you simply can't do without a good pair of studio headphones. They have two main jobs in a recording studio room. First is tracking; this is when a performer wears them to hear the backing track while recording, which stops that sound from bleeding into the live microphone.
The second job is for critical listening while you're mixing. Headphones can reveal tiny, subtle details—like clicks, pops, or the lingering tail of a reverb—that you might completely miss on your main speakers. You'll find two main types:
Closed-back headphones: These are great for isolation. They stop sound from leaking out and getting picked up by the mic during recording.
Open-back headphones: These feel more natural and spacious. They're usually preferred for long mixing and mastering sessions because they cause less ear fatigue.
The demand for high-quality audio production isn't just a niche interest; it's reflected in the health of Australia's music industry. The local recorded music sector has seen fantastic growth, with wholesale sales climbing 6.1% to a value of $717 million. This boom is almost entirely driven by digital sales, which now account for 91.5% of the total market. It's a clear signal of how people are consuming content and why well-equipped creative spaces are more important than ever. You can dive deeper into these industry trends over at the Australian Recording Industry Association (ARIA).
Designing Your Room for a Seamless Workflow
Having incredible gear and a perfectly treated room is a huge win, but it’s only half the battle. The final piece of the puzzle is laying out your recording studio room so that your workflow is smooth, intuitive, and, most importantly, inspiring. The aim is to create a space where the technology gets out of the way, letting your creativity take centre stage.
A smart, ergonomic layout is all about reducing friction. It eliminates those small technical roadblocks that can pull you out of a moment of inspiration. When everything you need is right where you expect it to be, you can stay in that creative flow for longer. It’s about making your studio feel less like a clinical lab and more like an extension of your mind.
Finding the Sweet Spot
The absolute cornerstone of your room’s layout is the listening position, otherwise known as the "sweet spot." This is the one place in the room where you'll hear the truest, most accurate representation of your audio. Get this right, and you can make critical mixing decisions with complete confidence.
Nailing this comes down to a simple bit of geometry. Your head and your two studio monitors need to form a perfect equilateral triangle. This just means the distance between the two speakers must be exactly the same as the distance from each speaker to your ears. This simple setup ensures the sound from both channels hits your ears at the same time, giving you a solid, reliable stereo image.
Here's a quick guide to getting it right:
Desk Placement: Set up your workstation along one of the shorter walls of the room. This generally helps you manage low-end frequencies far better than setting up along a long wall.
Measure Between Speakers: Pop your monitors on stands or isolation pads. Now, measure the distance between the centre of the left speaker cone and the centre of the right one.
Form the Triangle: Sit in your chair and adjust its position until the distance from your head to each speaker is identical to the measurement you just took.
Check the Height: The last step is to make sure the tweeters (the small drivers that handle high frequencies) are aimed directly at your ears. You might need to tilt the monitors slightly to get this perfect.
Your listening position isn't just a personal preference; it's a scientific necessity for accurate mixing. If you're not in a properly configured sweet spot, you're hearing a skewed version of your music, which will lead to mixes that just don't sound right on other systems.
Taming the Cable Chaos
Few things kill the creative vibe faster than staring at a tangled mess of wires. That "snake pit" behind your desk isn't just an eyesore; it's a practical nightmare when you need to track down a signal issue or plug in a new piece of gear. A clean, organised cabling system is essential for an efficient recording studio room.
Start with the simple stuff: label both ends of every single cable. Seriously, this one small act will save you countless hours of frustration later on. Use velcro ties, cable sleeves, or raceways to bundle everything neatly and run them along the back of your desk or against the walls. Out of sight, out of mind.
Practical Layouts for Different Spaces
Of course, the best layout is going to depend on the size and purpose of your room. A small bedroom setup has very different needs to a large, dedicated studio space.
For smaller rooms (think under 15 square metres), a minimalist approach is your best friend. Keep your desk against the wall, have your main microphone on an easily accessible stand, and tuck instruments away along the side walls to maximise floor space.
If you’re lucky enough to have a larger room, you can start creating dedicated zones for different tasks. You could have a treated vocal corner, a permanent spot for a drum kit, and even a small sofa for clients or collaborators to chill on. The key is to design a layout that makes sense for your process, making the jump from one task to the next feel completely effortless. This is how you transform your recording studio room into a true creative sanctuary.
How to Make the Most of Your DIY Studio Experience at That Creative Hub
Let's be honest, building a proper recording studio room from the ground up is a massive project. But what if you could skip the build and get straight to creating? At That Creative Hub, we’re all about empowering you to do just that — whether you’re a seasoned pro or just starting out. Our spaces are designed to be plug-and-play, but we’re always here to support behind the scenes.
More Than a Room: A Creative Concierge
The real magic of a managed studio space is the freedom it gives you. When the logistics of crew, gear, and setup are sorted, you can pour 100% of your mental energy into your performance and the final product.
Need help? Just ask. Can’t get a crew together? Let us handle it. We act as a concierge service for creators, linking you with the right people and tools to bring your vision to life. From photographers to editors, lighting setups to sound checks — we’ve got you.
Using a professional recording studio room for hire is about more than just better gear—it’s about a better creative process. It knocks down technical barriers and puts a support system around you, making those ambitious, high-end production goals feel closer than ever.
Plug-and-Play, Whatever Your Project
Whether you’re a podcaster or a visual creator, a flexible studio space can adapt to exactly what you need. This is a huge advantage over a home setup, which is usually built for just one thing.
Using the Cyclorama Studio? Bring your own camera and crew or ask us to connect you with a trusted photographer or videographer from our network. If you’re new to lighting or unsure how to get started, we can guide you through what you need or step in with setup support. The goal is to make it easy for you to walk in and create confidently.
Podcast Studio Access: For podcast users, we offer a fully-equipped, ever-evolving set with a dedicated production manager on-site. Whether you’re filming an interview, a solo series, or a branded piece of content, we can help set the vibe and adjust the layout to suit your vision. The set is flexible, the gear is high-quality, and the support is here if you need it.
This approach makes getting that polished, professional look and sound surprisingly simple. To see what this looks like in the real world, it’s worth exploring the different options available when you look into recording studio hire in Melbourne.
Exploring Modern Uses for a Studio Room
Investing in a high-quality room isn't just about polishing your next track; it's about opening up completely new revenue streams. The core principles—acoustic control, pro-level gear—are the same whether you're recording a podcast, designing sound for a film, or streaming live to an audience.
This versatility is a massive advantage, especially within Australia’s vibrant creative scene. The music publishing and sound recording sector alone has an estimated market size of $1.0 billion. A huge chunk of that comes from licensing audio for film, TV, and ads—all of which begins with a clean recording in a professional space. You can get a closer look at Australia's sound recording industry trends on ibisworld.com.
Podcasting and Voice-Over Production
With the explosion of podcasting and audiobooks, the human voice has become the star of the show. A professional recording studio room gives you that ultra-quiet, controlled environment needed to capture every subtle detail of a great performance.
For voice-over work in ads or animation, the aim is often to create a completely 'dead' acoustic space. This is done by packing the room with sound absorption to kill any reflections, giving you a dry, intimate vocal track that’s a dream to work with in post-production. The whole point is to capture the voice, and absolutely nothing else.
A great voice recording is defined by what you don't hear—no room echo, no outside noise, no distractions. The studio's job is to create a perfect sonic vacuum around the performance, allowing the voice to shine with absolute clarity.
Cinematic Sound Design and Foley
Ever wonder how movies and video games create such immersive worlds? A huge part of that magic happens in a studio with Foley artists. These are the creative minds who use an incredible collection of props to record everyday sounds—footsteps, rustling clothes, clinking glasses—all perfectly timed to the action on screen.
A recording studio room built for Foley needs to be sonically neutral but also highly adaptable. It demands an incredibly low noise floor to pick up the faintest sounds, plus enough physical space and different surfaces to recreate a whole range of sonic textures.
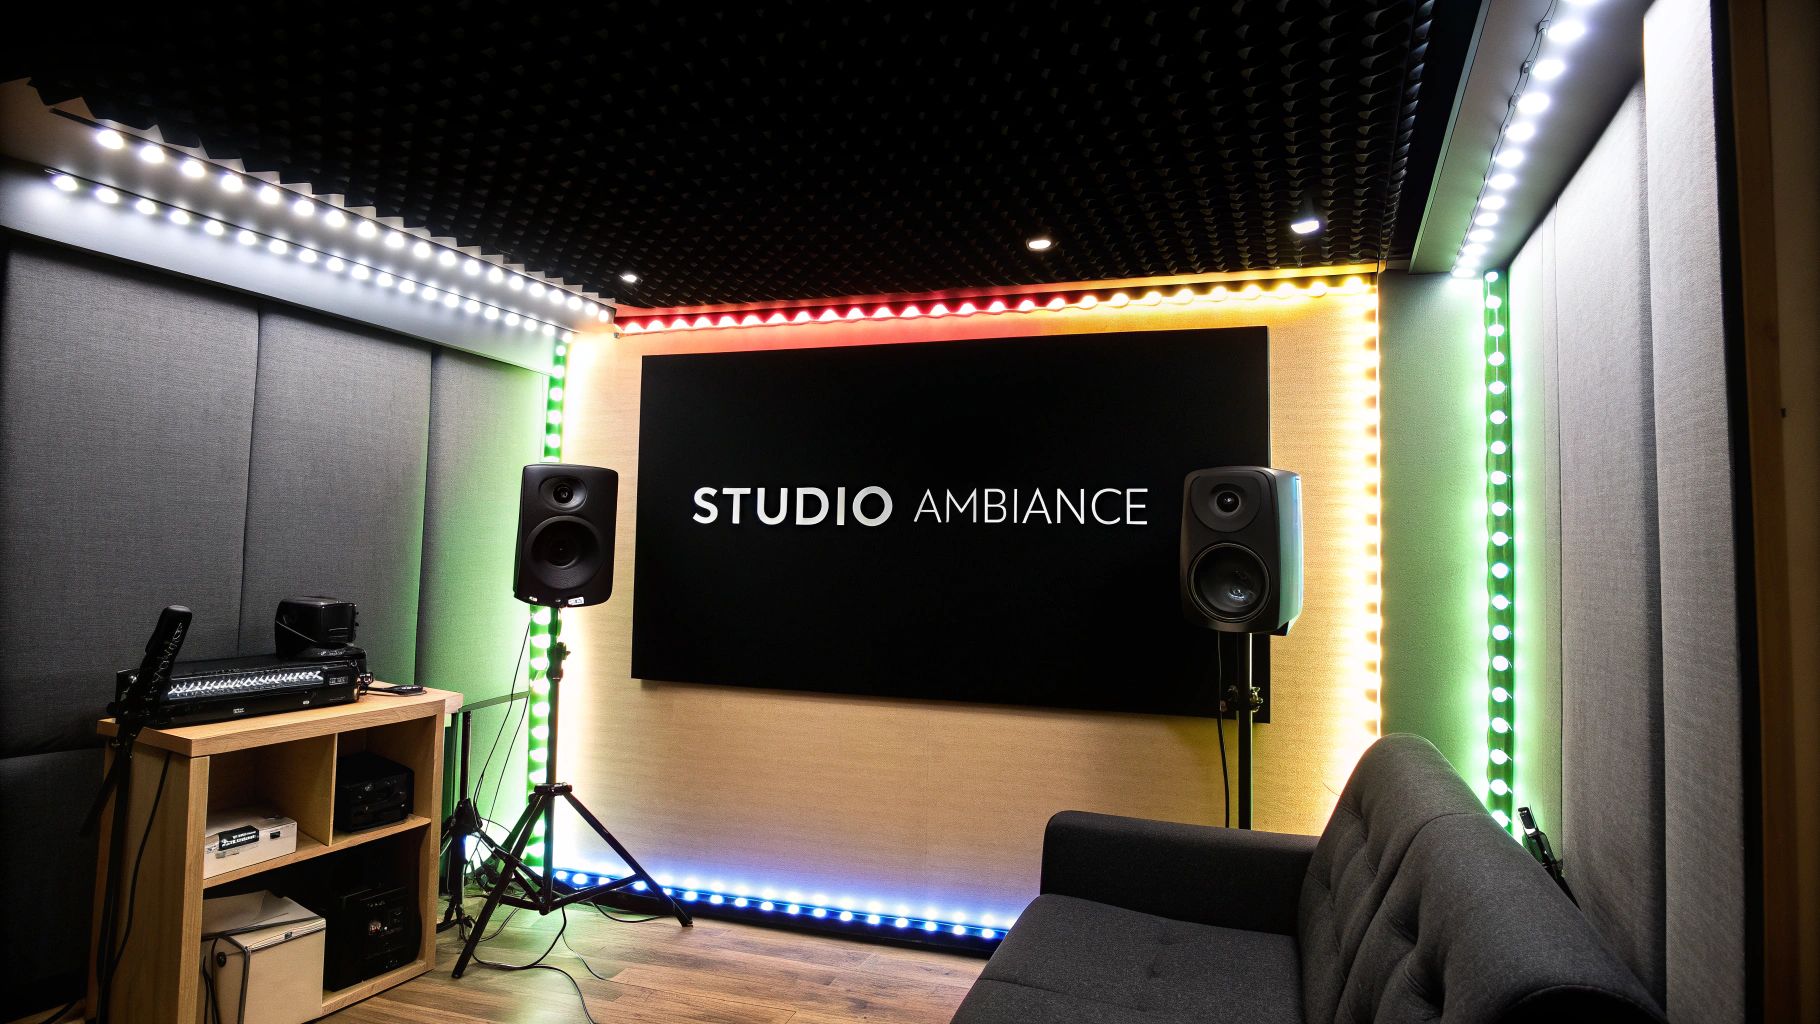
Live Streaming and Content Creation
These days, high-quality audio is non-negotiable for anyone serious about live streaming. Whether you're a gamer, an educator, or a brand, a dedicated studio space ensures your broadcasts sound crystal-clear, without the distracting echoes and background hum that plague most home office setups.
This is where audio and visual needs really come together. It’s not just about a great microphone and solid acoustics; you also have to think about lighting, camera angles, and set design. By controlling the entire environment, you can deliver a polished, professional stream that keeps your audience hooked.
Your Questions, Answered
Jumping into the world of audio recording always sparks a few questions. Let's clear up some of the most common ones you might have about setting up and using a recording studio room.
What’s the Real Cost to Build a Basic Recording Studio Room?
This is a classic "how long is a piece of string?" question. Honestly, the costs can swing wildly. You could get a solid bedroom setup off the ground for just a few hundred dollars—we're talking a decent microphone, an audio interface, headphones, and maybe some DIY acoustic treatment.
On the other end of the spectrum, a professionally designed and fully kitted-out room can easily climb into the tens of thousands. My advice? Start smart. Pour your initial budget into the foundations: a reliable audio interface, one really versatile microphone, and proper acoustic treatment. You can always add more gear to your collection as you grow.
Can I Actually Use a Regular Bedroom as a Studio?
You absolutely can. It might surprise you how many professional-sounding records got their start in a simple bedroom. The main hurdles you'll face are the room's acoustics—especially those pesky standing waves created by parallel walls—and noise bleeding in from outside.
But you can definitely manage these issues. Get creative with what you already have: strategically placing furniture, laying down thick rugs, and using bookshelves full of books can make a big difference. Add some dedicated acoustic panels and bass traps, and you're well on your way. Complete soundproofing is a massive (and expensive) job, so sometimes the simplest solution is the best: pick the quietest room you have and record when the world outside is asleep.
If there's one thing engineers and producers always agree on, it's this: acoustic treatment is the single most critical element. A world-class microphone in an untreated room will sound awful. A modest mic in a well-treated room, on the other hand, can sound incredible.
Do I Really Need a Separate Live Room and Control Room?
Not at all, especially when you're starting out. While the classic two-room setup is the professional standard for a reason, a single-room studio is completely functional and incredibly common for home recording artists. This just means you'll be tracking and mixing in the same space.
The trick is simple: wear headphones while you're recording. This stops your microphone from picking up the sound coming out of your speakers, which would cause a nasty feedback loop. When you're ready to mix, you can switch over to your studio monitors to hear everything accurately.
Ready to create without the setup hassle? That Creative Hub offers professionally designed, plug-and-play studio spaces for your next project. Book your session today and focus on what you do best—creating.
Comments